Hula Hoop Wedding Centerpieces
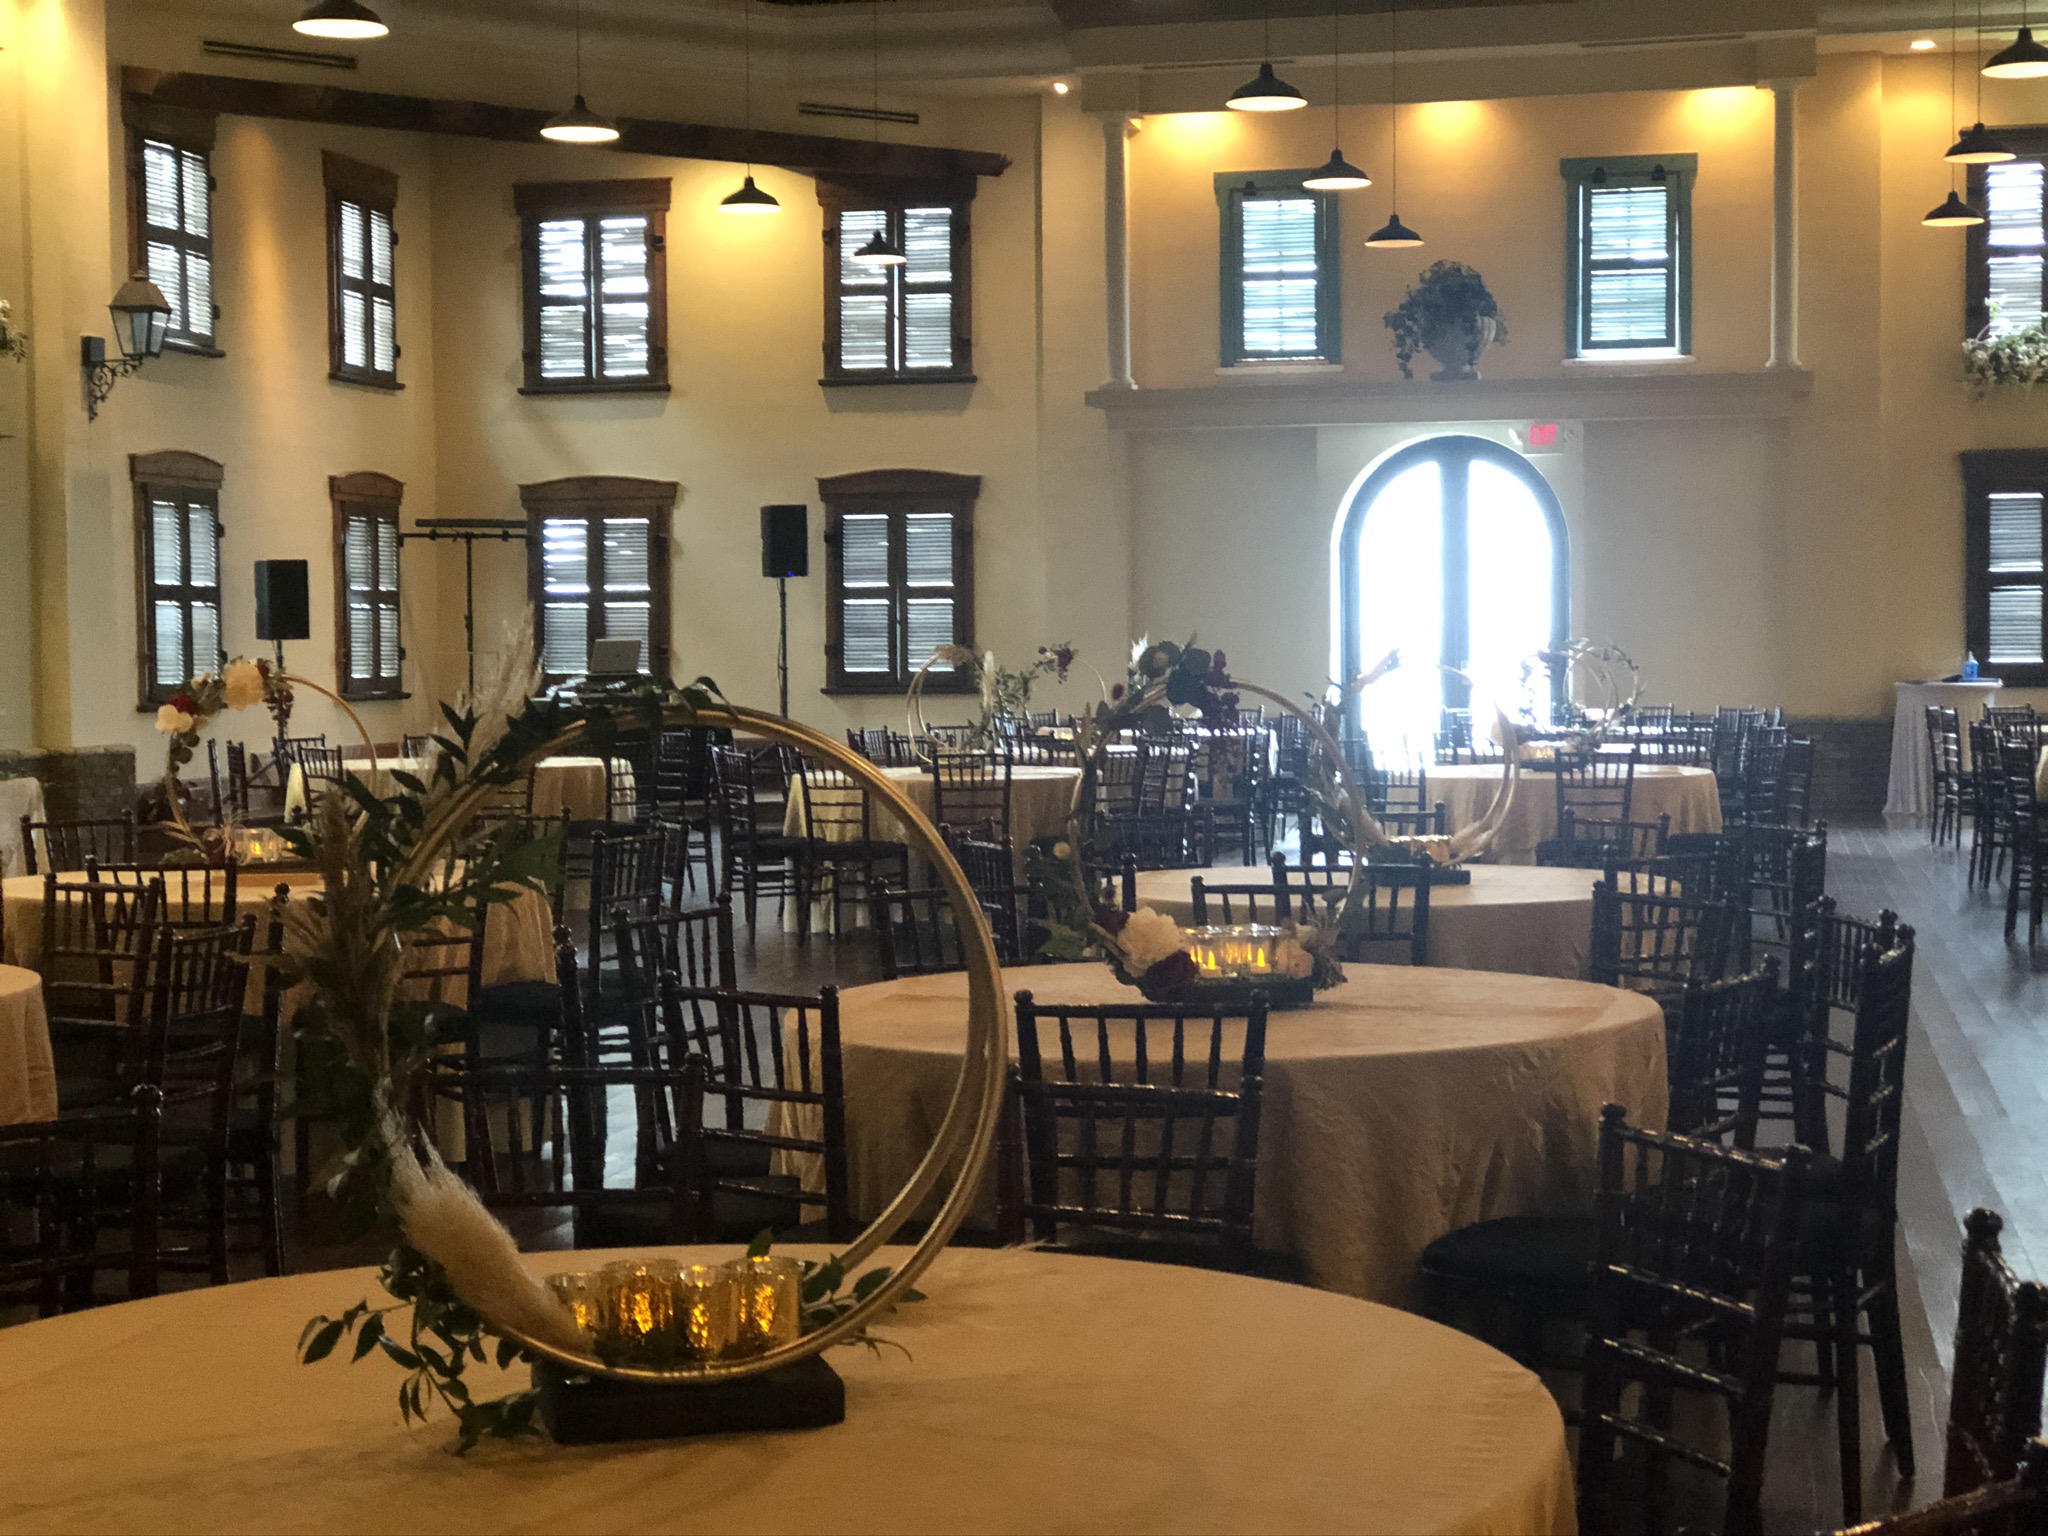
As promised I wanted to show you how well the hula hoop centerpieces turned out for my nieces wedding in this post.


My pictures don’t do these pieces justice but I didn’t want to wait for the photographers pictures to blog about this since I told you this would be my next blog. I’m new to this blogging thing so you’ll just have to show me some grace😜, anyway, you can get the jist of these by what I’m showing you lol.

For the single hoops all you will need is the following:
- A base... We made ours out of 2 x 4 and 1 x 6 scrap wood so no extra cost but there are so many options or ways this could be done so get creative!
- 1 hula hoop ( if you know you are going to make these early on then you can just keep an eye out during off season and get these at extremely low cost! Several of these we got for 75 cents, some for 1.00, and some of the hoops that we got last minute were $3.00.). We bought 28 hoops. If we had been able to have gotten them all at .75 cents then we could have potentially saved $63.00 so, as you can see, if you plan ahead you could save quite a bit even on something as inexpensive as a hula hoop!
- Candle Votives ( We got ours at the Dollar tree)
- Decorative trimmings ( The cost on this could definitely vary from extremely cheap to extremely high depending on what you want... the silk flowers on these hoops were bought at Hobby Lobby at half price and then we filled in with real greenery that the florist brought with her on the day of wedding.)
- Primer and paint color of your choice for the hoops. As you can see here, we chose gold.
- Wood stain or paint for the bases. We used wood stain in ebony color on ours.
- Tools- Wood cutting tool (we used a chop saw)., Screw gun, screws (we used what we had since they weren’t going to be seen), drill, scissors, glue gun, glue sticks, and floral wire, floral cutters
The way these were put together were so simple that no step by step pictures are really necessary.
1.) Prepare your Hoops:
To prepare your hoops, simply pull the plastic off any that have plastic wrapping, pull hoops apart and pour the inside rocks out that make noise (this is just a preference), then cut down to size if you want them smaller than they come. Put back together.
Prime the hoops with a primer good for plastic ( you can skip this step if you want but if you do then plan on doing touch up along the way because some will take paint well and some won’t ), then paint hoops your desired color and let dry well.
2.) Make your Bases:
We cut 2 x 4’s to the size we wanted ( the length you want your base to be) Ours ended up being 11”. You will need 2 for each base.
You will need one piece of 1 x 6 for each base or anything similar cut down to be smaller than the base length so in our case, we made sure they were under 11”. It doesn’t need to be long since you don’t want to see it. It just needs to be long enough to be able to sit well with the 2 x 4’s on it as it’s soul purpose is to have something to attach the 2 x 4’s to to create the well that the hoop fits down into. We used what we had so some were 1 x 6’s while some were 1 x 8’s, and we even used some plywood scraps that we cut down. Remember... this part will not be seen.
Put the two 2 x 4’s on top of the 1 x 6 close enough that you can snuggly insert a hula hoop. I actually put a hula hoop between the 2 x 4’s and marked the end of the boards where you could see where they need to be, and then flipped the bases over and screwed the 1 x 6 to the two 2 x 4’s. That’s it!
Stain or paint your bases and set aside to dry well.

Top

Bottom
3.) Put it all together:
Now comes the fun part. Insert one of the hula hoops into one of the bases. If it’s not quite snug enough then you can always put some tape around the center of that part of the hula hoop because it won’t show at end product. If you do happen to get one that’s to tight to fit then you might have to readjust the boards to work., then get creative! I tried to keep the single hoops uniform but unique so on each one the arrangement was placed a little differently, but you do what’s right for you! I used both hot glue and floral tape to hold my arrangements. Here is where I would go ahead and use floral wire because it will be easier to cover up with greenery than the tape was.

For the double hula hoops You will need:
- 2 hula hoops for each centerpiece.
- 2 x 6” scrap wood cut to whatever you want it to be. We stuck with 11” on these as well. You’ll only need 1 per base.
-paints and stains as listed for single hoop pieces
-tools as listed for single hoop pieces only you need to add something to attached the hoop to the base.
We used a bracket used for pvc pipe pictured here, which  you can get at any hardware store. ( get the size close to the size of a hula hoop.) only we folded it over and put the same screw through both holes

-candle votives. As you can tell I went with another kind on these but they were still bought at the dollar tree.
-decorative trim as listed above. On these we went with all real pampas and greenery.
Here are the steps:
1.) Prepare your hoops:
Prepare hoops as above only you need 2 for each base this time.
2.) Make the base:
To make base, cut a piece of 2 x 6 to the length you’d like and then stain or paint and set aside to dry.
attach the hoops to the top of your base using either the brackets I talked about above by basically wrapping them around the hoop and putting one screw through both holes like as pictured here, or maybe you have a better way.

After attaching the bottom of the hoops, I went ahead and attached the top of the hoops together with some E6000. I tied a piece of gardeners tape around the top just to help it stay stable while drying.
3. Put it all together:
Repeat as above and decorate these hoops with whatever you would like!

WANT TO TAKE IT OVER THE TOP WITH THE HOOP THEME?
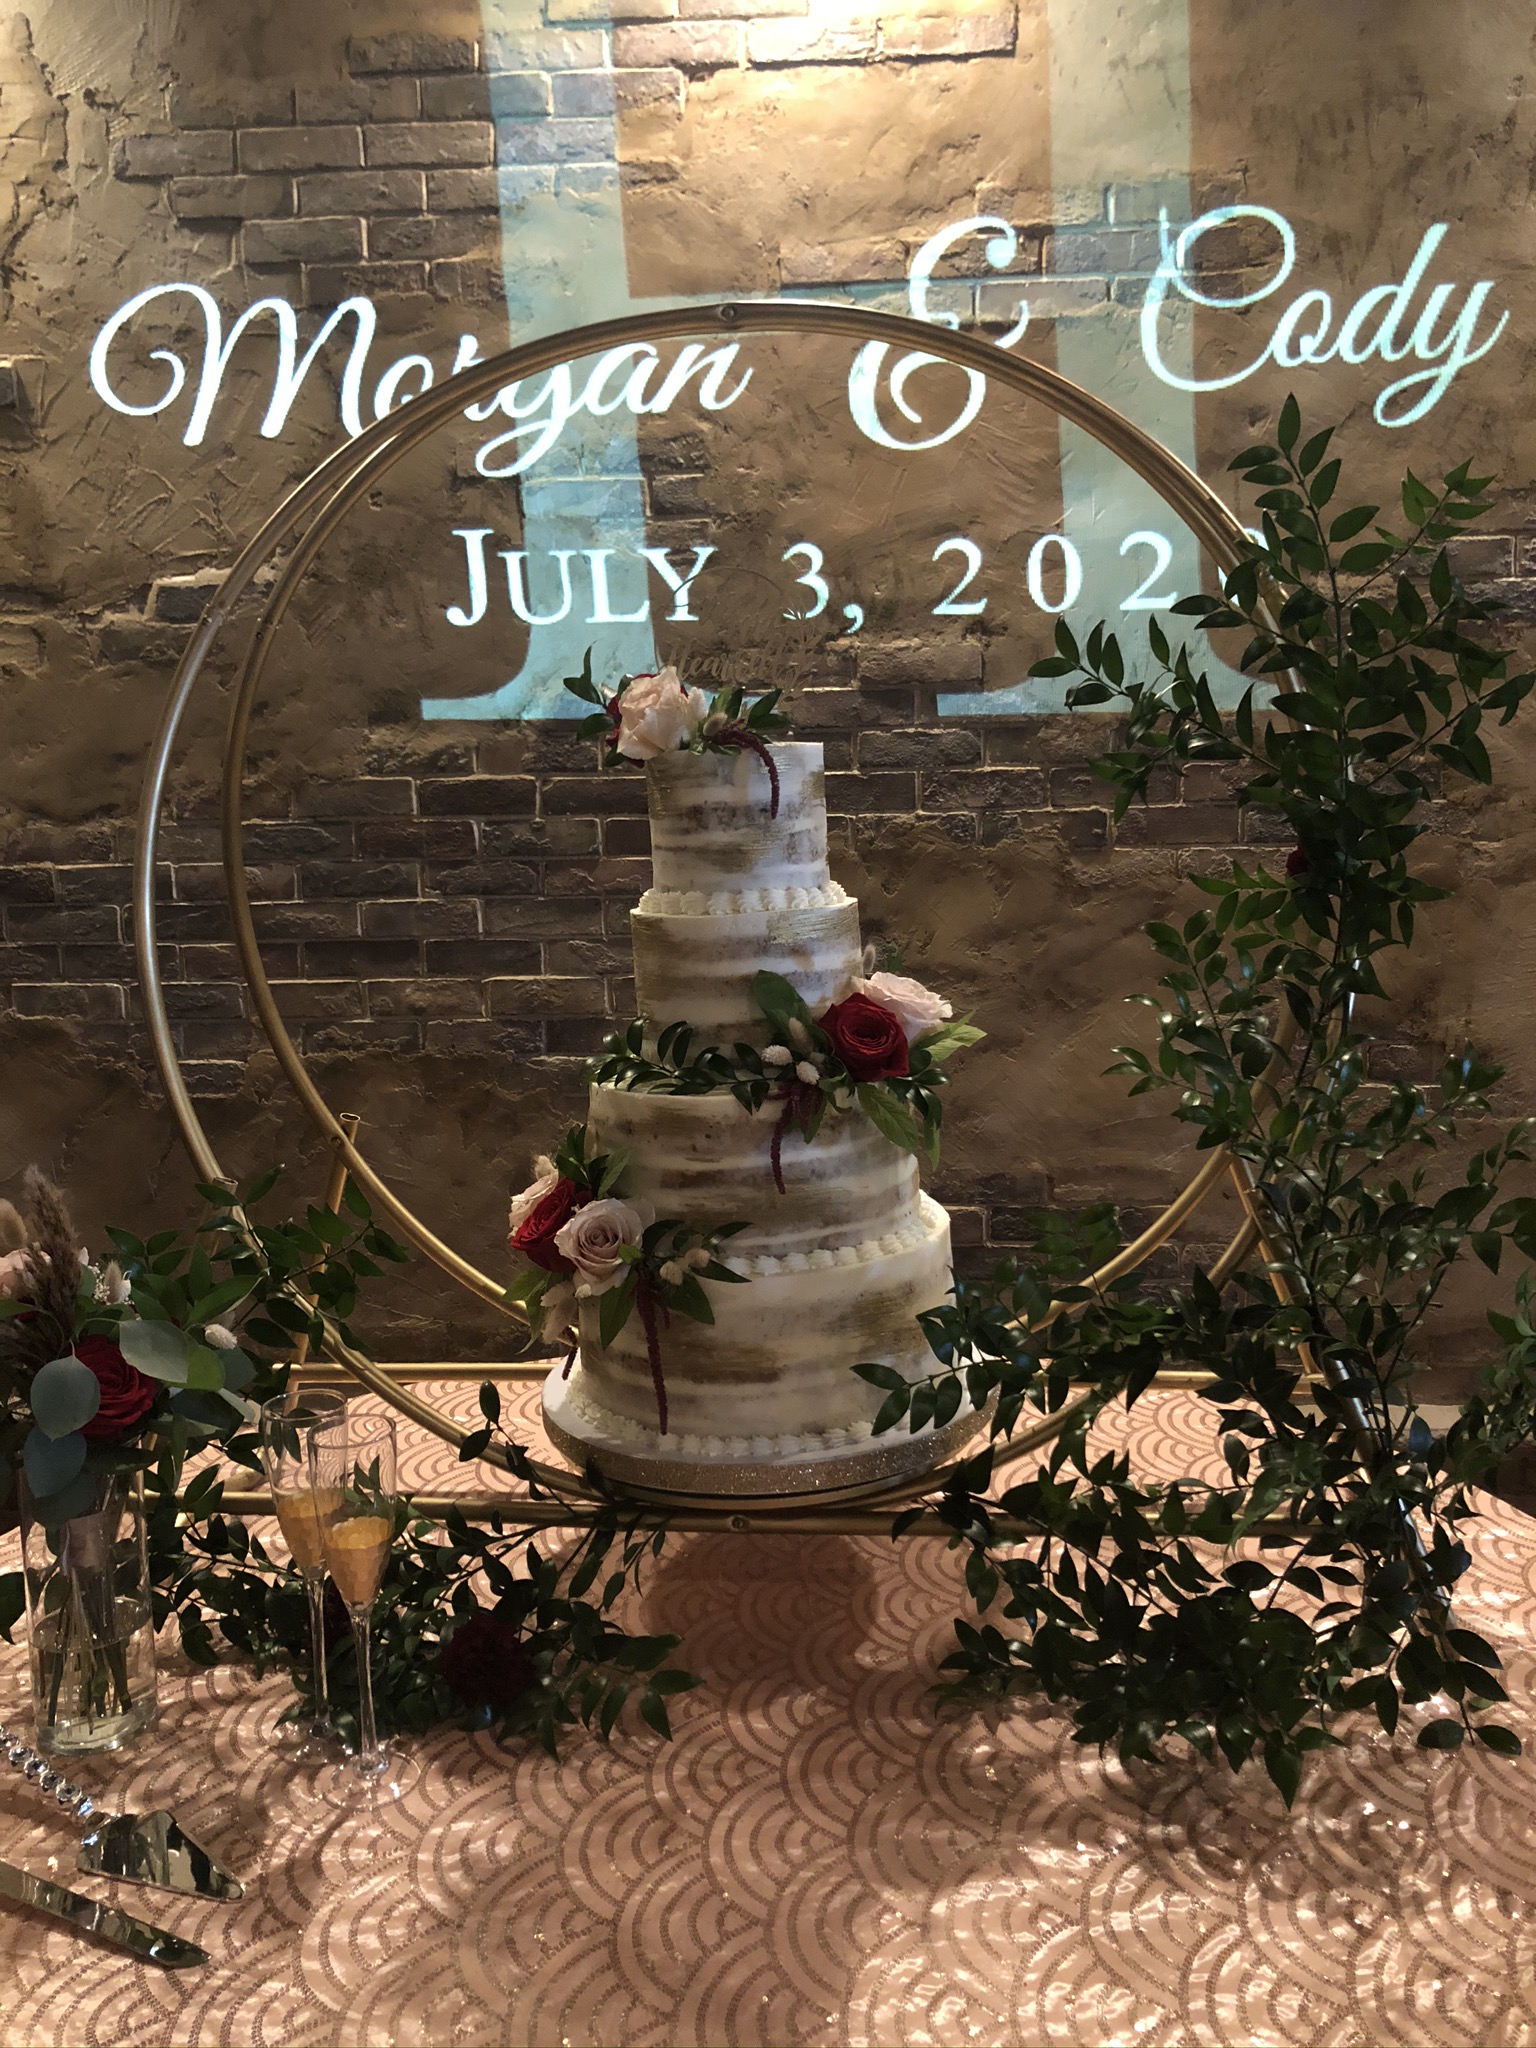
Try finding a used 48’ Dia tubular firewood rack. Paint it to match your colors and then arrange your cake right in the middle! Stunning isn’t it! The florist did this arrangement but in my mind I see it with lots of pampas and greenery wrapped in a circular motion to match the other double hooped centerpieces 🥰

Comments
Post a Comment